
How to Avoid Costly Structural Mistakes When Building a Hardtop Backyard Gazebo
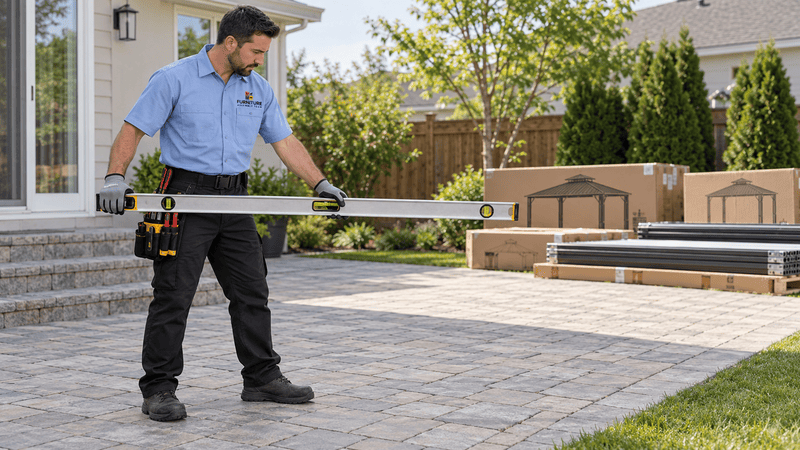
Hardtop gazebo assembly typically involves site preparation, component organization, frame squaring, post alignment, roof sequencing, hardware tightening, leveling, anchoring considerations, and final checks. The installation approach depends on gazebo size, surface type, roof design, terrain, manufacturer requirements, access, drainage, and exposure.
- Prepare the site before building.
- Square the frame before completing the roof.
- Keep posts consistently aligned.
- Follow the specified roof installation sequence.
- Match anchoring to the surface and manufacturer requirements.
The Site Can Ruin the Gazebo Before Assembly Starts
Hardtop gazebo assembly starts with a suitable site, not the first bolt. A poorly prepared base can affect post alignment, roof fit, and anchoring. Product photos hide these challenges, making large kits appear simpler than their many structural connections suggest.
Once assembly begins, a skipped step or uneven post position can cause problems that become harder to correct. Rushed roof installation may expose frame errors only after heavy panels go overhead. Unsuitable anchoring adds another concern beneath an otherwise finished structure.
Professional assembly offers a practical way to coordinate these details. Furniture Assembly Team helps homeowners connect site conditions with frame assembly, roof sequencing, leveling, and hardware checks. That planning matters before final tightening and anchoring, not afterward.
Check the footprint before opening boxes
Confirm the gazebo’s post footprint and total roof dimensions. Roof overhangs can extend beyond the advertised floor area. Therefore, a patio that fits the posts may still lack sufficient clearance.
Evaluate the installation location before opening boxes or assembling major components:
- Surface dimensions: Allow space for base plates, roof overhangs, tools, and assembly access.
- Surface condition: Check concrete, pavers, decking, or prepared ground against the model’s requirements.
- Slope and drainage: Identify low spots, runoff paths, and areas where water collects.
- Overhead clearance: Account for trees, branches, utility lines, and the finished roof height.
- Nearby obstacles: Measure distances from walls, fences, doors, and walkways.
- Furniture clearance: Leave room for chairs, table access, and comfortable movement.
A compact Washington, DC, courtyard may fit the gazebo but lack space for lifting roof sections. Meanwhile, a Maryland patio may slope toward a drain that post placement must not obstruct.
Locate underground utilities before drilling or digging. Confirm applicable local requirements with the appropriate authority before installation.
Parts and Instructions Need a System
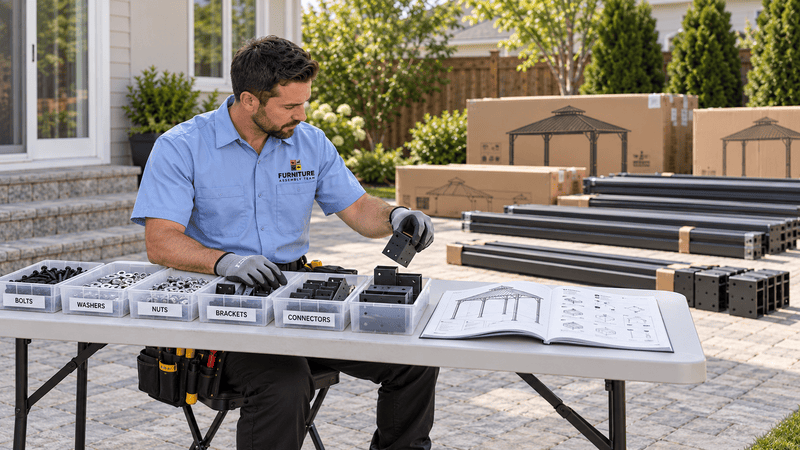
Organizing the kit before assembly reduces confusion between similar parts and helps reveal missing components. Match labels, hardware bags, and quantities to the manual. Follow the instructions for your exact model because connection details and roof sequences differ between gazebo designs.
Hardtop gazebo assembly means organizing, assembling, aligning, leveling, securing, and checking a permanent-roof gazebo. Manufacturer instructions, installation surfaces, site conditions, and intended outdoor use guide that process.
Separate structural parts from finishing pieces
Create distinct groups near the work area without blocking access:
- Posts and beams: Match labels, orientation marks, and connection holes.
- Roof rails and cross-members: Separate pieces that look similar but serve different positions.
- Roof panels: Sort by size, label, and installation location.
- Brackets and cross-bracing: Identify every required support connection.
- Fasteners: Keep labeled bags separate and check bolt lengths against the parts list.
- Finishing components: Group decorative trim, gutters where included, base covers, and anchoring hardware.
Do not assume two bolts are interchangeable because their heads match. Different lengths, washers, and threads may serve specific connections.
Read the full sequence before starting. Some brackets need installation before another component blocks access. Others remain temporarily loose until the frame reaches the specified alignment.
Keep packaging, labels, spare hardware, and instructions until the project is complete. If a structural part is missing, pause rather than improvise.
For projects combining a gazebo with seating, professional outdoor furniture assembly services can help coordinate the broader backyard setup.
A Square Frame Makes the Roof Possible
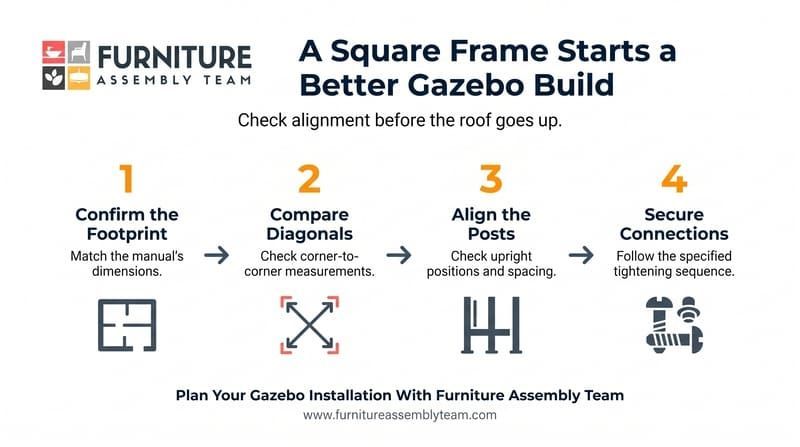
A square frame gives roof components the geometry they need to meet correctly. Establish the footprint, check post spacing, and compare diagonals before completing the roof structure. Keep connections adjustable only where the manual permits, then follow its specified tightening sequence.
Small errors at ground level can become obvious overhead. A shifted corner may leave rafters uneven or prevent roof panel holes from lining up.
Measure more than the outside edges
For a rectangular gazebo, compare opposite sides and measure both diagonals between matching corner reference points. Equal diagonals help confirm squareness when side lengths and corner positions also match. However, diagonal measurements alone do not confirm vertical posts or level beams. Those checks need separate attention.
Use this frame alignment checklist:
- Confirm the footprint dimensions against the manual.
- Check post spacing at consistent reference points.
- Compare both diagonal measurements.
- Check beam alignment and corner connections.
- Check each post for vertical alignment in both directions.
- Install cross-bracing and brackets at the specified stage.
Cross-bracing helps control movement between connected frame sections. Never omit it because the unfinished frame appears to stand without support.
Follow the manual’s temporary support requirements. A partly assembled gazebo should not serve as a freestanding shelter during construction.
Tighten after alignment checks, not instead of them
Final tightening locks connections into position. It does not correct an inaccurate footprint or bring a leaning post upright.
Recheck measurements as the manual directs, especially after installing braces or moving major components. Then tighten connections in the specified order, using stated torque values when provided.
Furniture Assembly Team’s professional gazebo assembly services support frame positioning, post alignment, roof assembly, and final connection checks.
For Northern Virginia backyard projects, these checks can identify surface concerns before roof installation makes adjustments harder. They cannot make every unsuitable surface workable.
Roof Panels Punish Early Alignment Mistakes
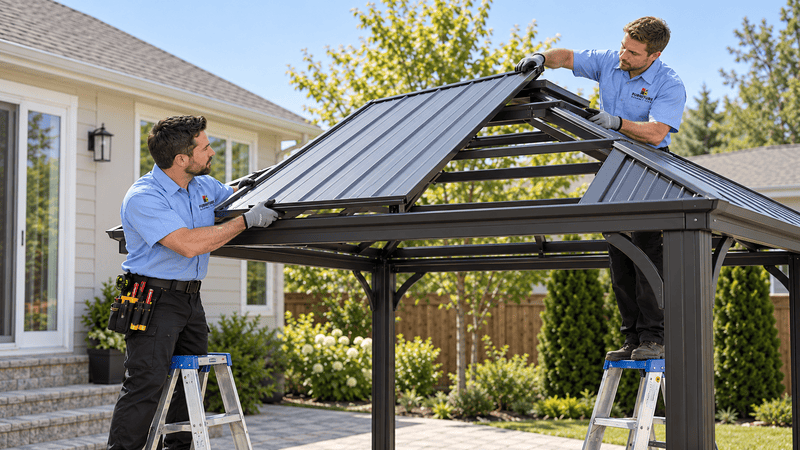
Hardtop roof installation demands careful alignment, controlled lifting, and the manufacturer’s exact sequence. Roof beams, hubs, rafters, and panels depend on earlier frame measurements. When components resist fitting, stop and check the structure rather than using fasteners to pull everything together.
A bolt should not act as a tool for dragging misaligned roof sections into position. Forcing parts can distort brackets, enlarge holes, or damage panel edges.
Establish the roof structure before closing it in
Some designs use a center hub that joins rafters. Others use ridge members, multiple roof tiers, or separate roof assemblies.
Follow the model’s lifting method and required crew size. Use suitable access equipment and specified temporary supports. Do not stand on roof panels or leave raised sections unsupported.
During gazebo roof installation:
- Confirm roof beam, hub, and rafter orientation.
- Follow the specified metal roof panel sequence.
- Match panel overlaps to the manual’s drainage direction.
- Install fasteners, washers, and seals in their designated positions.
- Fit edge trim and gutters at the required stage.
Where the kit uses polycarbonate panels, follow its face markings and fastening requirements. Do not transfer instructions from a metal-roof model.
Stop when panel holes stop matching
If several holes fail to align, check the frame before blaming the panels. Post spacing, corner position, or rafter orientation may explain the mismatch. Do not drill replacement holes, bend brackets, or overtighten fasteners without manufacturer approval. Such changes can damage components and complicate later corrections. Wind also makes overhead panel handling harder. Follow the manufacturer’s weather restrictions and stop when conditions prevent controlled lifting.
The Surface Decides How the Gazebo Sits
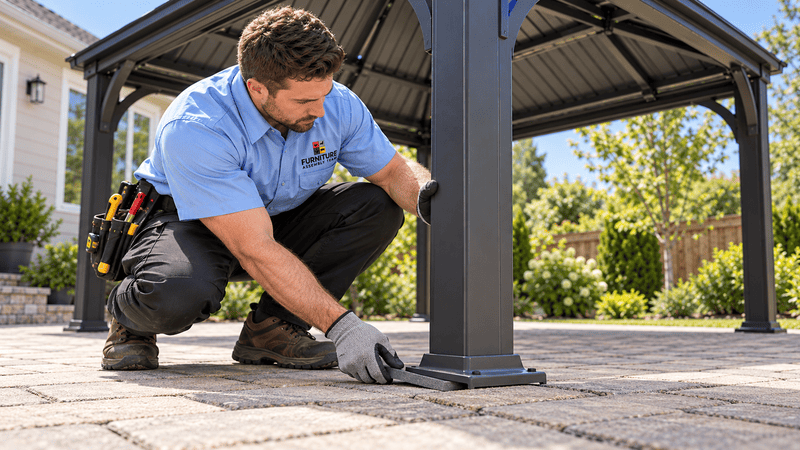
The installation surface determines how posts bear weight, how the frame sits, and which anchoring methods need consideration. Concrete, pavers, decks, and prepared soil require different evaluations. A surface that supports patio furniture does not automatically provide a suitable gazebo foundation or anchoring point.
Gazebo leveling means checking the structure’s intended elevations and support conditions. It does not mean forcing every base plate onto an unsuitable surface.
| Installation surface | What to evaluate | Anchoring consideration |
|---|---|---|
| Concrete slab | Slab condition, thickness, slope, and edge distances | Use specified concrete fasteners only where the slab meets requirements |
| Paver patio | Paver movement, bedding, and underlying foundation | Individual pavers may not provide suitable anchor support |
| Deck | Structural capacity, framing, connections, and access below | Attach to suitable structural framing as specified |
| Prepared soil | Bearing conditions, drainage, settlement, and footing needs | Use approved footings or ground anchors only where appropriate |
Preserve drainage without twisting the frame
A patio may include intentional drainage slope. However, that does not mean the gazebo can accommodate any difference between post elevations.
Check the manufacturer’s surface tolerances and approved support details. Never use loose scrap wood or improvised stacks beneath base plates.
Before anchoring, confirm:
- Base plates sit on suitable, supported locations.
- Manufacturer anchors suit the actual installation conditions.
- Concrete fasteners meet specified installation requirements.
- Structural brackets connect to appropriate supporting material.
- Ground anchors suit the model and site.
- Post placement preserves drainage routes.
Wind exposure also matters when evaluating the model and anchoring requirements. A sheltered-looking yard does not eliminate the need for prescribed anchoring.
For a Delaware rental patio or Pennsylvania garden installation, resolve foundation concerns before assembly day. Obtain qualified structural evaluation when deck capacity or foundation suitability remains uncertain. Larger backyard plans involving a different roofed structure may need pavilion and garden structure assembly rather than a gazebo-specific installation approach.
Small Shortcuts Create Expensive Corrections
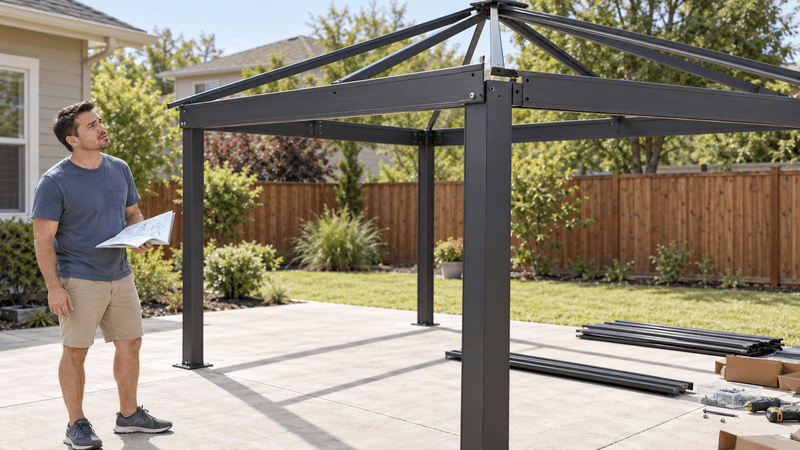
Most avoidable gazebo assembly problems begin with small departures from the instructions, not dramatic mistakes. Mixed hardware, early tightening, missing brackets, and skipped alignment checks can compound as construction advances. Correcting the frame before roof completion often requires less dismantling than fixing it afterward.
A roof panel that will not fit may reflect an earlier frame issue. Therefore, pause at the first repeated mismatch.
Catch errors before they spread
Watch for these common gazebo assembly mistakes:
- Tightening too early: This removes adjustment room before alignment checks.
- Mixing hardware: Similar fasteners may have different lengths or functions.
- Skipping diagonals: Matching side lengths do not alone confirm a square footprint.
- Misaligning posts: Leaning posts can change overhead connection positions.
- Forcing roof panels: Pressure can damage holes, brackets, and panel edges.
- Ignoring drainage: Incorrect overlaps or gutter orientation can interfere with runoff.
- Using unsuitable anchors: Surface appearance does not establish anchoring suitability.
- Building on an unprepared base: Settlement or uneven support can undermine the installation plan.
- Missing brackets: Omitted connections leave the kit incomplete.
- Skipping final checks: Loose hardware and unfinished connections can escape notice.
Follow the manufacturer’s maintenance schedule after installation. Check connections and anchoring as directed rather than assuming assembly ends all future inspection needs.
Why choose our team for gazebo alignment and roof setup
Furniture Assembly Team provides residential gazebo, patio furniture, and outdoor structure assembly support. Professional coordination helps reduce assembly guesswork and supports accurate frame alignment.
The work brings hardware organization, manufacturer instructions, surface checks, post positioning, and roof installation into one plan. Leveling and anchoring considerations remain tied to the model and actual site conditions.
This approach can make complex roof installation easier to manage. It also helps homeowners approach gazebo setup with a clearer installation plan. Clean work practices include organizing components, keeping access routes clear, and controlling loose hardware. Property-conscious installation also means identifying unresolved site concerns instead of covering them with trim. Once the structure is complete, patio furniture assembly and setup can help arrange seating without crowding posts, entrances, or walkways.
Professional gazebo installers are especially useful for heavy roof sections, complex kits, restricted access, and multi-item backyard projects.
Book Hardtop Gazebo Assembly
Professional hardtop gazebo assembly coordinates site preparation, component organization, frame squaring, roof installation, leveling, and anchoring considerations. Furniture Assembly Team helps turn those connected tasks into a practical installation plan.
Arrange professional outdoor assembly services for your gazebo and related backyard furniture. Include the gazebo model, dimensions, surface type, access details, and site photos when describing your project.
Plan your backyard gazebo installation before lifting the roof
Homeowners, landlords, and property managers across Washington, DC, Maryland, and Northern Virginia can request installation support. Furniture Assembly Team also serves Delaware and Pennsylvania.
Request a gazebo installation quote to discuss your kit, site conditions, and scheduling needs. Resolve preparation questions before the frame goes up.
Frequently Asked Questions
What should I prepare before hardtop gazebo assembly?
Before hardtop gazebo assembly, confirm the footprint, suitable surface, access, drainage, and overhead clearance. Keep all kit boxes, labeled hardware, and manufacturer instructions available.
Does a gazebo need a perfectly level surface?
The surface must meet the gazebo manufacturer’s support and leveling requirements. Drainage slope needs evaluation, and loose shims cannot substitute for a suitable base.
Can a hardtop gazebo be installed on pavers?
Sometimes, but paver condition, underlying support, and anchoring requirements need evaluation first. Do not assume individual pavers can provide adequate anchor support.
Should a gazebo be anchored to concrete?
Follow the manufacturer’s anchoring requirements for the specific model and slab. Concrete condition, thickness, edge distances, and fastener specifications influence whether the proposed connection is suitable.
Why is frame squaring important during gazebo assembly?
Frame squaring helps roof beams, rafters, and panel holes meet in their intended positions. Check side lengths, diagonals, and post alignment before completing the roof.
How many people are usually needed to assemble a hardtop gazebo?
Many kits require multiple adults, especially when lifting roof sections. Follow the manufacturer’s minimum crew size and lifting instructions rather than assuming two people will always suffice.
What are the most common gazebo assembly mistakes?
Common mistakes include early tightening, mixed hardware, skipped diagonal checks, misaligned posts, forced panels, unsuitable anchors, and missing brackets. Ignoring drainage and final connection checks can also create problems.
When should I hire professional gazebo installers?
Consider professional help when the kit includes heavy roof sections, complex connections, or difficult access. Resolve uncertain foundation or deck conditions before assembly begins.